
Keeping my little ones engaged and occupied while I’m at work is always a challenge when the school holidays roll around. In June earlier this year, I shortlisted a little schedule of activities based on Emily Gravett’s book, Blue Chameleon, with my five-year-old which both he and his 18-month-old little sister really enjoyed. I thought I’d share them here given that the September school hols are just around the corner!
The book relates a simple tale about a chameleon that feels lonely and blue. He tries to make friends with objects and other creatures by trying to change himself so that he’s be more like the thing or creature he’s trying to befriend. But in the end, he finds a friend when he is able to be himself.
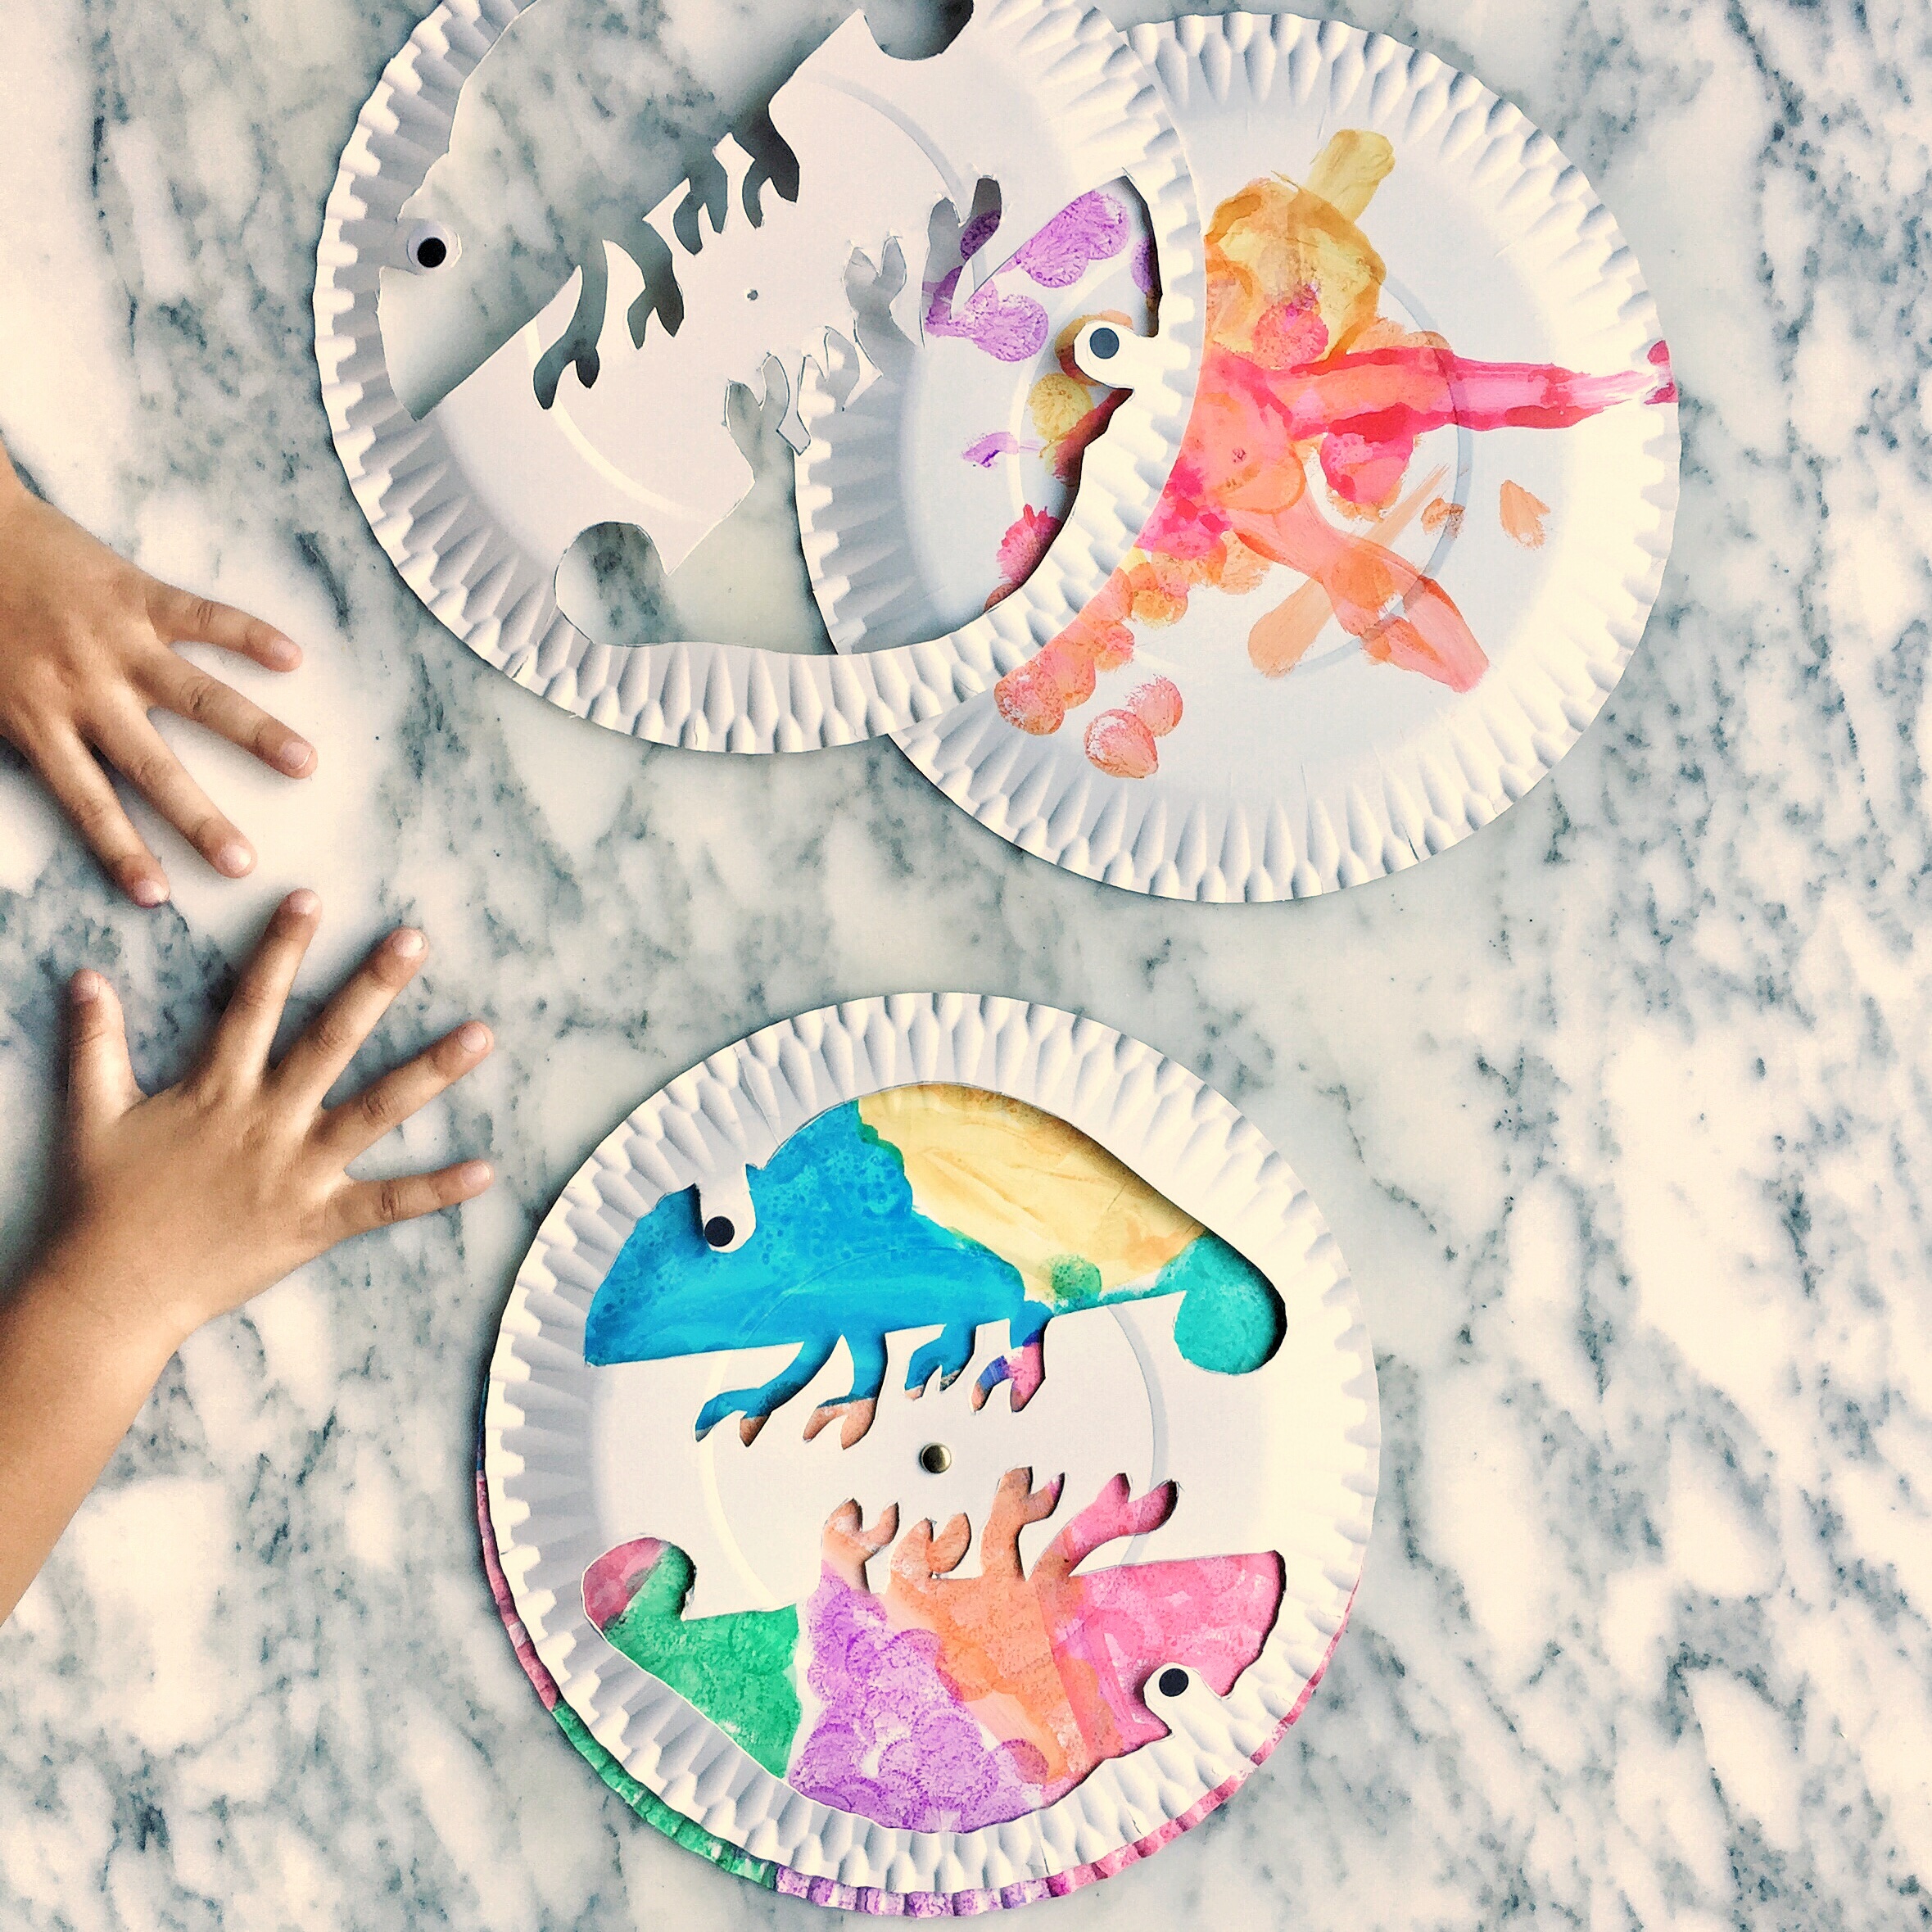
For each chameleon, you need:
2 paper plates (main course size)
print out of a chameleon silhouette (try Googling chameleon template for kids)
craft knife
cutting mat
water colour paints and brushes (love this set from Ikea) or washable paint dot markers
1 brass fastener (you can find them at crafting supplies stores)
2 self-adhesive eyes (optional, I stuck black circles onto larger white circles for my kids. It just made making the eyes easier for my 18-month-old)
Directions
1. I found it easiest to cut out the chameleon printout (adjust the size so that you can fit two chameleons on the plate if you like) and use it as a guide for drawing the outline of the chameleons onto the paper plate. Double-check which side of the paper plate will hold/absorb your paint of choice.
2. Using a craft knife, cut out the chameleon over a cutting mat. Leave a spot for an eye to be drawn or stuck on.
3. Invite your child to layer paint colours onto the uncut plate. Set aside to dry.
4. Place the plate with the chameleon cut out over the painted plate.
5. Secure in the middle with a brass fastener, ensuring that the plates can rotate easily.
6. Get your child to affix the eyes if using. Or draw/paint them on.
7. Next, get him or her to spin the plate and watch the chameleon change its colours!

Drawing Challenge
This was more suited to the five-year-old. I drew something on a sheet of paper (he happened to ask me to keep to Japanese food) and invited him to draw a picture of a chameleon trying to transform itself to resemble the item I had drawn.
Alternatively, you could print out pictures of things or creatures for your child to refer to. Try to keep to things with simple outlines and fairly uniform textures or colour.
This was a great little activity we did at the breakfast table just before I left for the office.
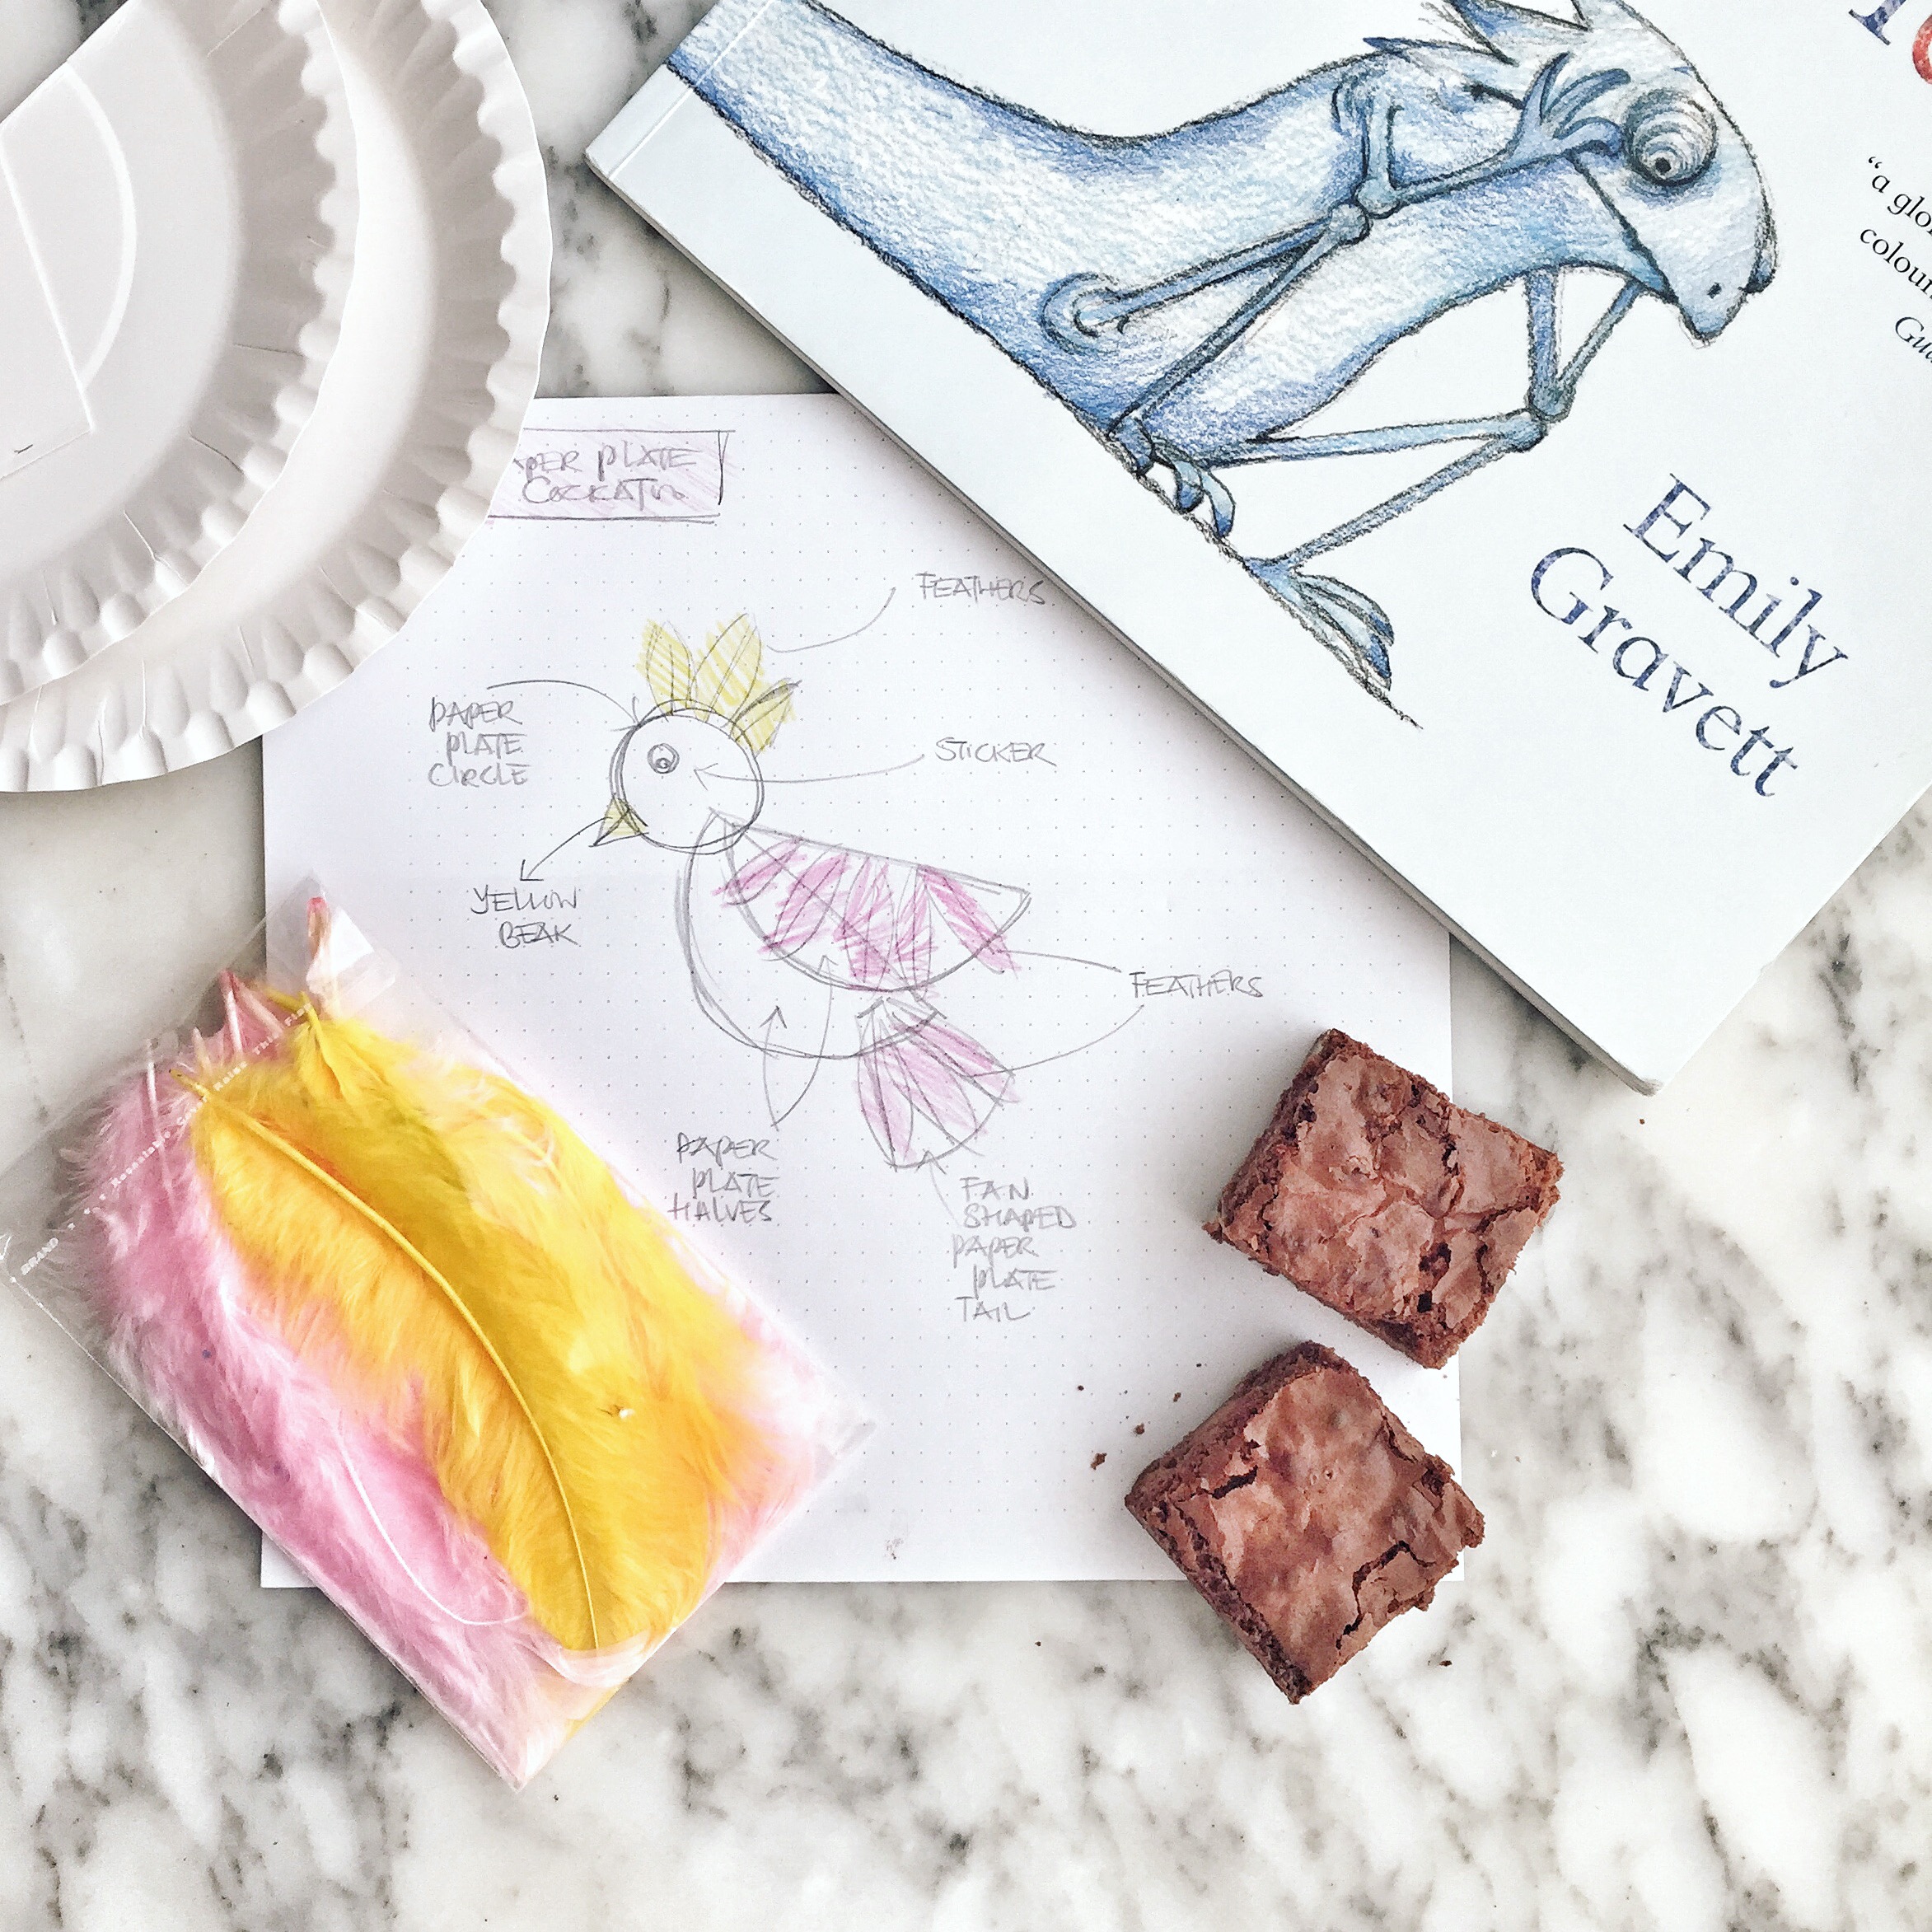
Paper Plate Cockatoo
At one point of the story, the chameleon tries to befriend a cockatoo. I found this activity idea on Activity Village which I use as a resource for my kids all the time. I’ve tweaked it a smidgen. But you might find the step by step illustrations here helpful.
For each cockatoo, you will need:
2 paper plates
glue
pink and yellow feathers (available at art supply stores)
1 small yellow paper triangle (for the beak)
1 self-adhesive eye (optional, I stuck black circles onto larger white circles for my kids. It just made making the eyes easier for my 18-month-old)
Directions
1. Cut one paper plate into half.
2. Cut a circle (for the head; I used a circle punch) and a pie wedge shape (for the tail) from the second plate.
3. Stick one paper plate half onto the other, fanning them out so that the top one resembles a wing on the cockatoo’s body. Attach the tail and head.
4. Stick three yellow feathers onto the back of the bird’s head.
5. Attach or draw eyes.
6. Glue the beak on.
7. Glue pink feathers onto the wing and tail.
I drew simple illustrated instructions to go with each cockatoo kit (pictured in the image at the beginning of this post) so that the five-year-old could assemble the cockatoo pretty independently with only minimal adult supervision. He also managed to help guide his little sister when she was making her cockatoo.
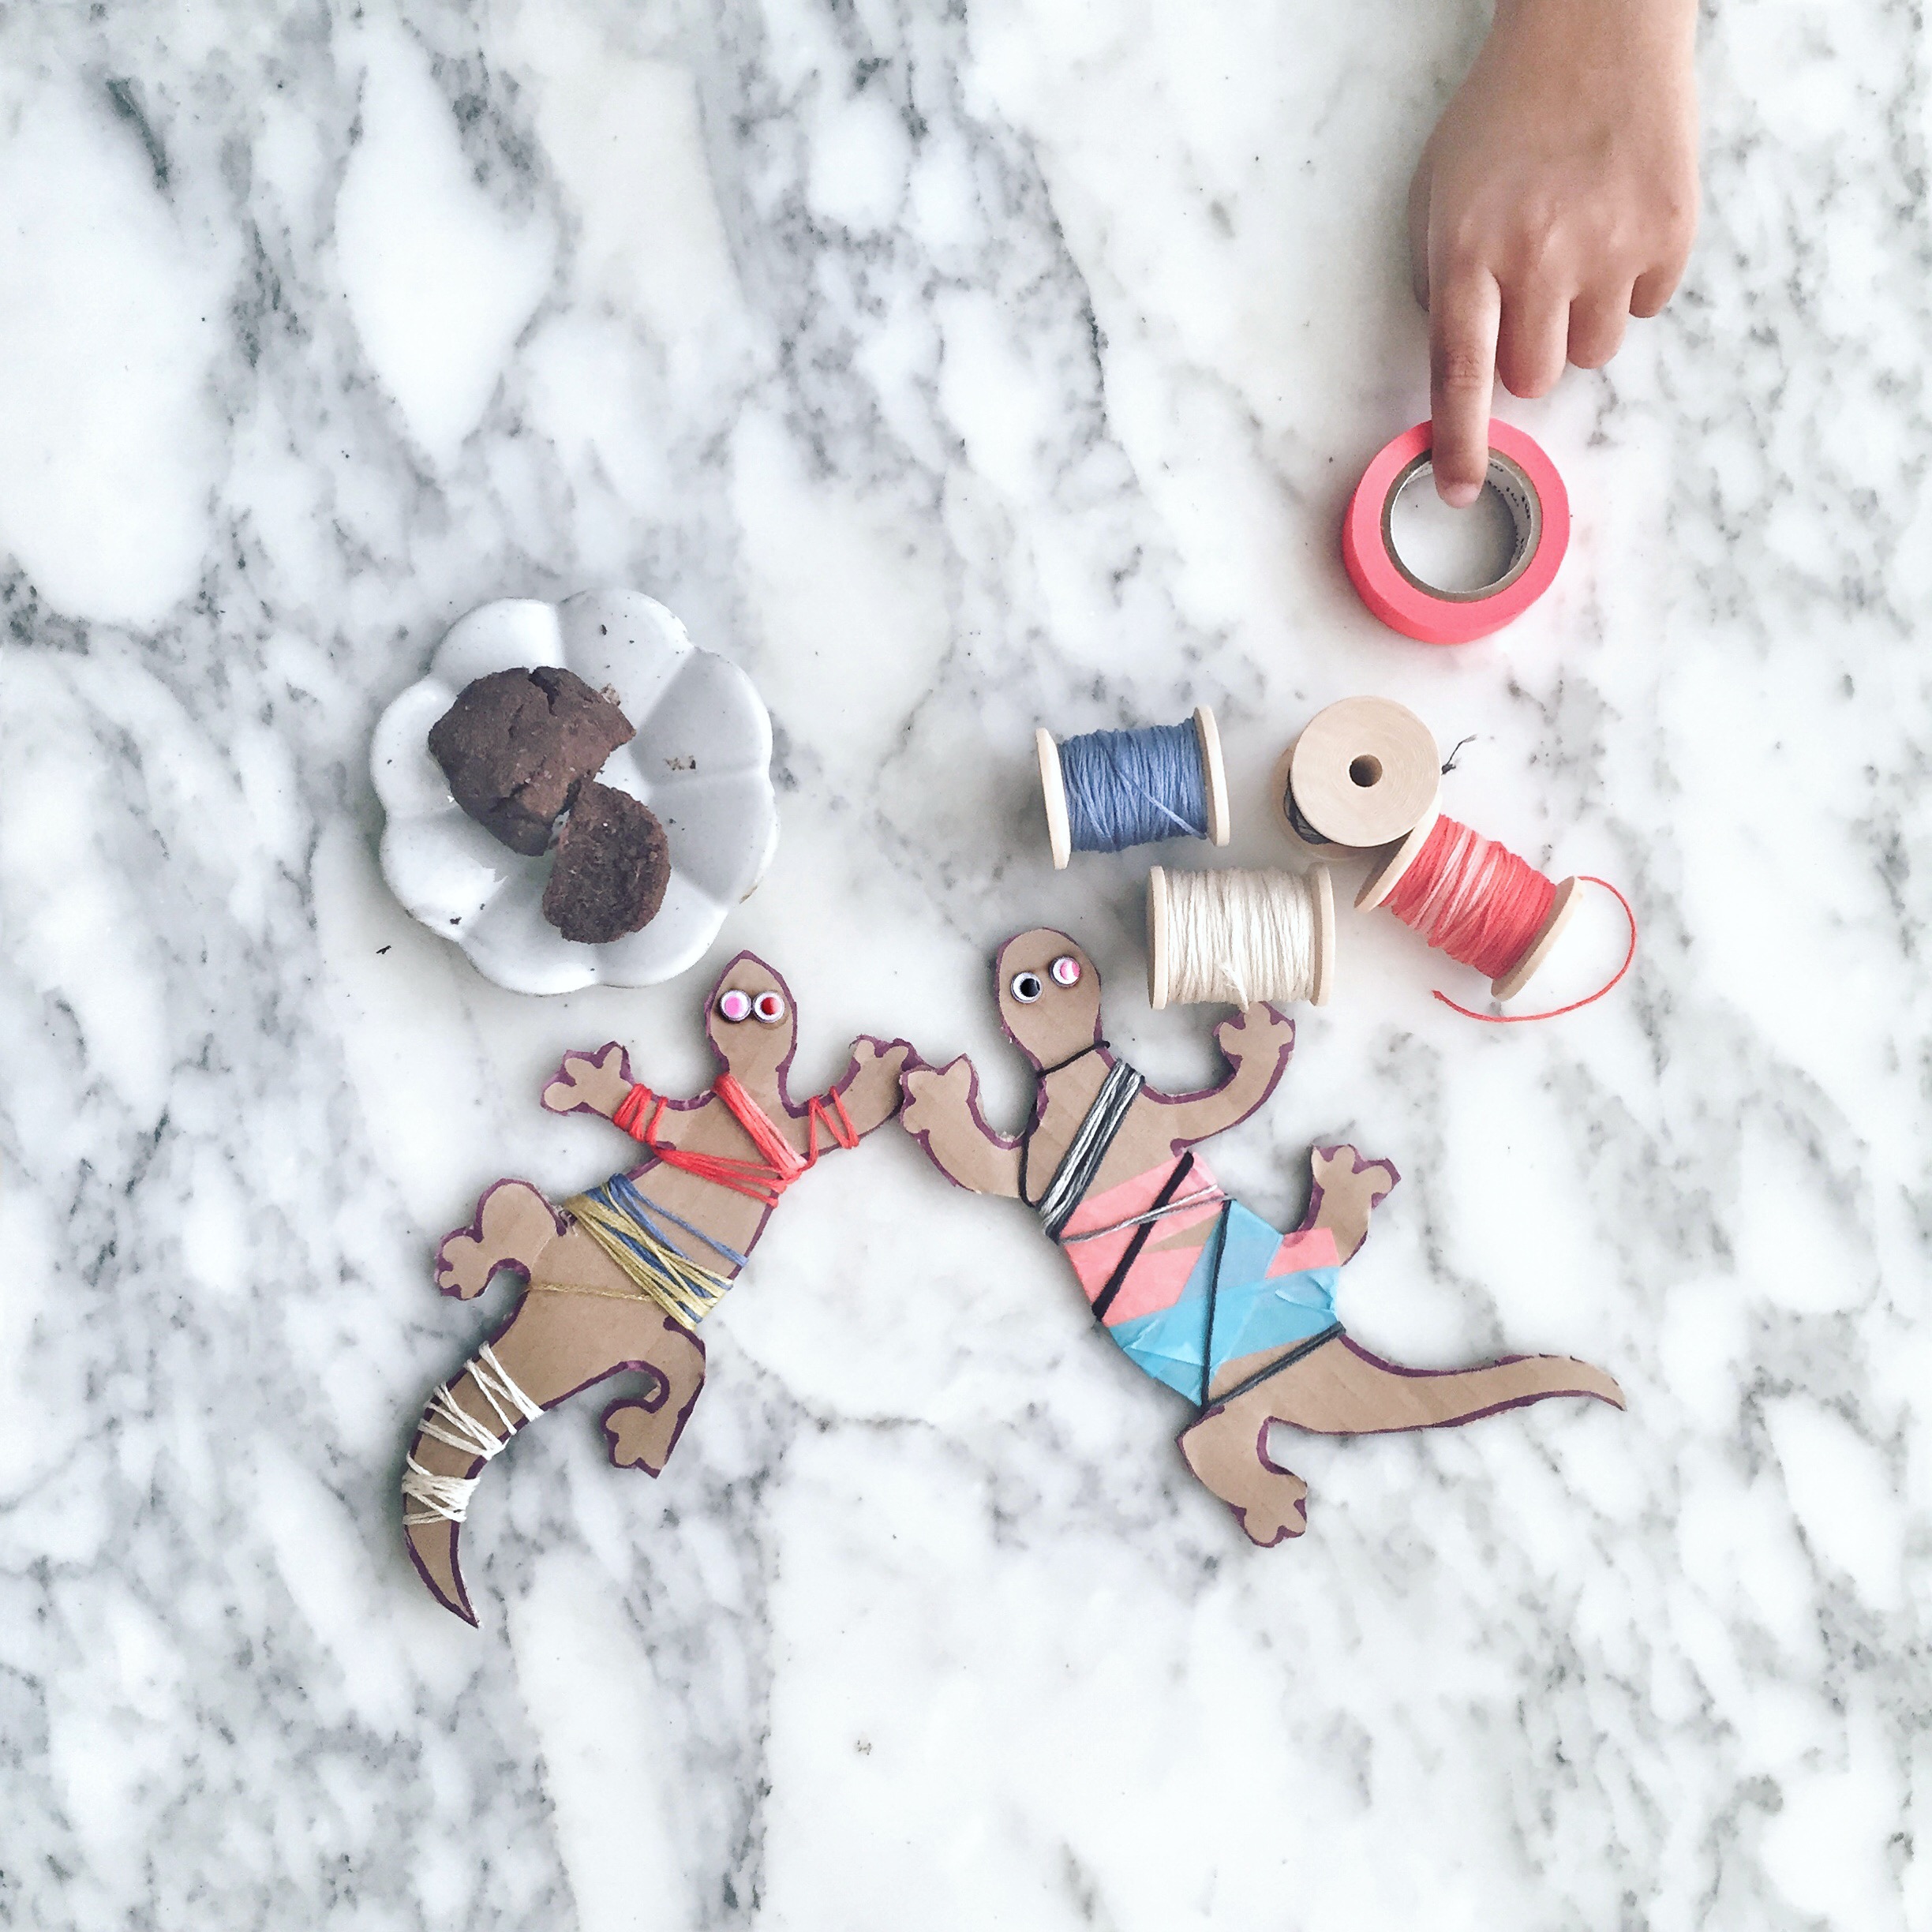
Cardboard & Thread Chameleons
This is an easy activity to pull together if you happen to be a crafter (like me) with lots of bit and bobs stashed away.
For each chameleon, you will need:
corrugated cardboard (we tend to keep some in our recycled craft material box)
craft knife
cutting mat
2 self-adhesive eyes (optional, I stuck black circles onto larger white circles for my kids. It just made making the eyes easier for my 18-month-old)
embroidery thread or wool in a range of colours
safety scissors
tape/washi tape
Directions
1. Draw a top down outline of a chameleon onto the corrugated cardboard (freehand or use something like this as a guide). If your child is, like mine, a stickler for details, take note that chameleons have five fingers or toes on each limb.
2. Cut out the chameleon over a cutting mat using a craft knife.
3. Get your child to attach the eyes.
4. Then get him or her to wind thread, wool or washi tape in a series of colours around the cut out to create the changing colours of a chameleon.
5. Hold down the ends of thread or wool with adhesive tape if necessary.
This was a super simple activity. I got my husband to supervise our son. It was a great opportunity for a little father-son bonding.
About Su-Lyn Tan
Su-Lyn is Aun's better half and for many years, the secret Editor behind this blog known to readers simply as S. Su-Lyn is an obsessive cook and critical eater whose two favourite pastimes are spending time with her three kids and spending time in the kitchen. She looks forward to combining the two in the years to come.
