Pantry Basics: Play Dough
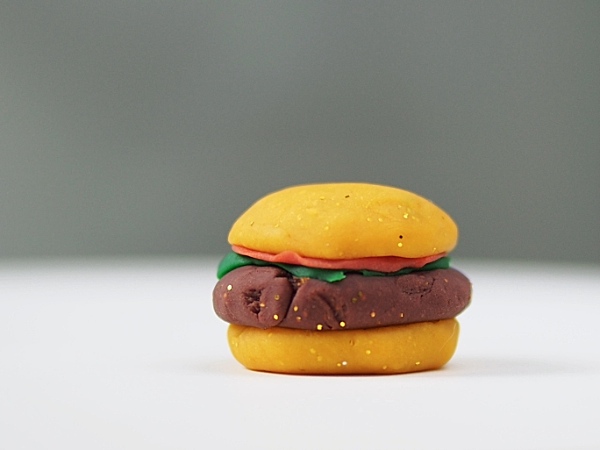
Regular readers may have noticed that I really enjoy making the odd children’s amusement from scratch. I think even CH didn’t fully comprehend my love of working with my hands until our toddler T came along. After almost a dozen years of marriage, it only recently dawned upon him that I’m a “crafty kind of girl” (I’m not quite sure if the pun was intended). I simply don’t believe that children ought to only discover things through pre-packaged stimuli that come out of a box. Of course, T receives plenty of toys, I don’t shun them, and he loves technology. But I try my best to throw in simple things like squishing play dough (yes, that’s a burger made out of play dough pictured above), touching grass with your bare feet, playing with ice cubes, finger painting, threading pasta, counting soybeans, and learning to tear sheets of paper into the mix.
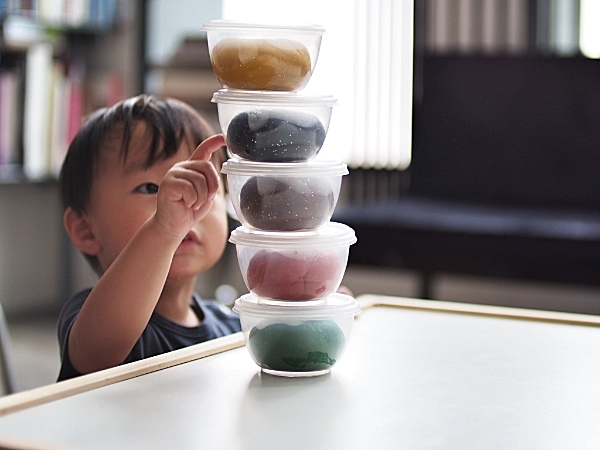
When I make something for him, it gives T and I the chance to have a discussion. We talk about the colours and textures he likes. I explain what the various components or ingredients are, and warn him about hot pans and sharp knives or scissors. He gets a full view of how things progress, how ingredients transform. And if there are decisions to be made along the way, we have a chat about them. For example, I personally thought black play dough coloured with charcoal powder then dusted with silver glitter, and brown play dough colored with cocoa powder (it smelt awesome) then dusted with gold glitter were terribly cool. T thought they looked like poop and had no interest in touching them. Who would’ve guessed? (It didn’t help that papa was shaping them into poop and leaving them on the floor.) Making things with T gives me the chance to expand his perspective of the world around him just a little. It also helps me to get to know him a whole lot better.
So, I started making T play dough late last year. When he first touched it, he was totally baffled by its texture. He loved the bright, bold colours. And it has become one of his favourite things to play with. We use it in all sorts of ways. The incredible list of play dough recipes and activities over at The Imagination Tree is one of my many online inspirations.
But there are heaps of play dough recipes out there. I hadn’t intend to add mine to the list until I discovered, quite by accident, that that using Hong Kong flour (a highly bleached flour used for making Chinese steamed buns) results in incredibly smooth and pliable dough. This means that when you unmould the play dough, it pops out really easily and the details are very clear. I happened to be clearing out some old Hong Kong flour out of my pantry some months ago and decided that rather than junking it, I’d make T some play dough with it. It’s now our favourite play dough recipe!
Play Dough
Glycerine is used in fondants to keep them soft and pliable. In Singapore, you can get glycerine at Phoon Huat. I prefer cooking the dough (there are no-cook alternatives) because it results in a smoother dough.
Makes about 1.5kg
500g Hong Kong flour (or just use plain flour)
300g fine salt
2 tbsp cream of tartar
750ml water
45ml (3 tbsp) vegetable oil
Food colouring (I use Wilton icing colours)
A few drops glycerine (optional)
A few drops of essential oil of your choice (optional)
Place flour, salt and cream of tartar in a large saucepan and whisk to combine. Add water and vegetable oil. Continue whisking until you get a smooth batter. Do this before you start to cook it. I’ve noticed that combining the ingredients as they cook leaves you with lumpy dough.
Cook over low heat, stirring frequently until it starts to come away from the sides of the pan and forms a ball. Keep cooking it until the dough achieves the pliable texture you desire.
Set aside to cool until you can handle it comfortably. Knead it (preferably on a Silpat or similar surface that protects your kitchen counter as you don’t want the colouring to stain it) until it becomes soft and smooth. If it feels too sticky, add more flour. If it’s too dry, add a few drops of oil or a tablespoon of water. I haven’t had to tweak it in this way.
Divide the dough into 5 balls each weighing 300g (for 5 colours) or 10 balls each weighing 150g (for 10 colours). I find that 300g per colour is pretty adequate and I further divide each batch of coloured dough into two (we play with 150g of each colour at any one time) and store the remainder so that we always have a full set of dough as back up or as a gift. Add food colouring little by little, kneading the ball of dough so that the gel is evenly dispersed. If you’re using gel based colouring, bear in mind that just a little goes a long way.
I find it easiest to then add drops of glycerine (for smoothness, shine and elasticity) and essential oil (for a pleasant natural scent; my current favourite is geranium) to each ball of dough. Trying to knead it into 1.5kg of dough at one time can be a little overwhelming.
The dough can be stored in Ziploc bags. Because we use ours nearly daily, I store ours individually in little plastic lunch boxes. If the dough is kept clean (as in you don’t get grit, dog hair and whatnot into it) it can last for months.
About Su-Lyn Tan
Su-Lyn is Aun's better half and for many years, the secret Editor behind this blog known to readers simply as S. Su-Lyn is an obsessive cook and critical eater whose two favourite pastimes are spending time with her three kids and spending time in the kitchen. She looks forward to combining the two in the years to come.


My boys used to love playdough when they were younger. I used to make loads of it and we used to spend hours making all sorts of things: animals, foods, people in fact anything! Great to see its still around.
Dear Connie, the great things in life endure the tests of time 🙂 we love our play dough and probably use it daily